Last Updated: October 30, 2026
Quick Summary
The steps to take after a roof leak are to contain the water with a bucket, move furniture and belongings out of the affected area, and shut off power to the room at the breaker if water is near fixtures or outlets. Leave the room and call a professional if the ceiling sags, outlets buzz, or cracks spread.
- Poke a small hole in a bulging ceiling with a screwdriver to release trapped water into your bucket.
- The drip spot on your ceiling rarely sits right under the actual hole in the roof.
- Keep drying equipment running for at least 24 to 72 hours, not just until surfaces feel dry.
- Call a pro when the affected area is larger than roughly 10 square feet of porous material.
- Photograph each damaged item in place with something for scale before you discard it.
Table of Contents
- What to Do When Your Roof Is Leaking: First 24 Hours
- How to Stop a Roof Leak Temporarily Before Help Arrives
- Roof Leak Water Damage Cleanup and Drying Your Home
- How to Document a Roof Leak Insurance Claim
- When a Temporary Fix Is Unsafe or Not Enough
- Renter, Landlord, and Property-Manager Responsibilities
- Schedule a Professional Roof Inspection With Covenant Roofing & Restoration
- Frequently Asked Questions
What to Do When Your Roof Is Leaking: First 24 Hours
A roof leak gives you a short window to limit the damage. The steps to take after roof leak starts are simple: contain the water, protect your things, and stay clear of anything that could hurt you.
Water finds its way fast. A slow drip can soak insulation, stain ceilings, and reach electrical wiring within hours. Move quickly, but safely.
Contain the Dripping Water With a Bucket or Container
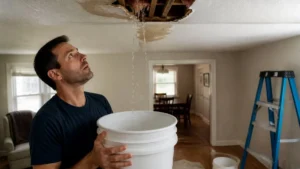
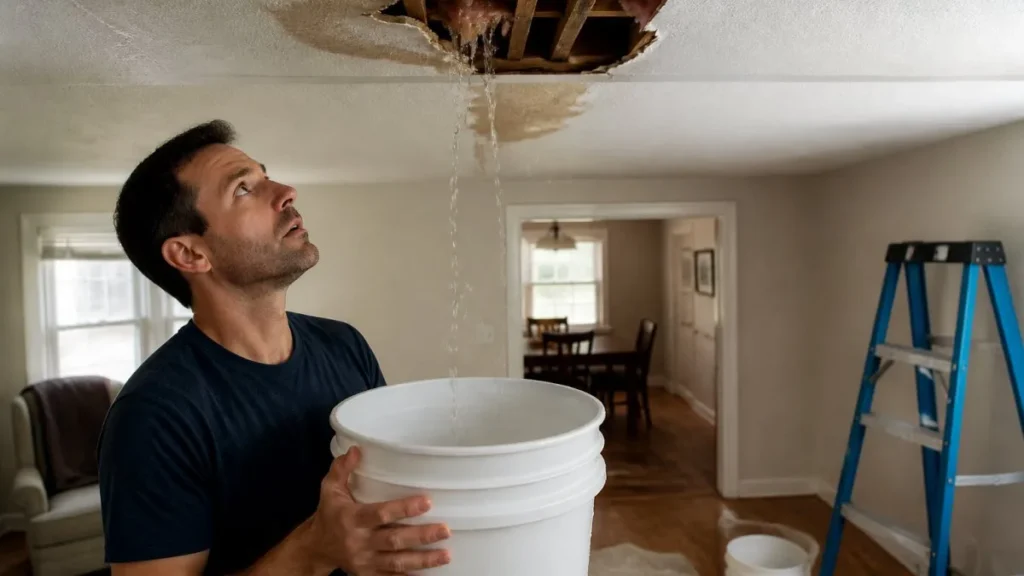
Start by catching the water. Place a bucket, tub, or large container under the drip. Line it with a towel to muffle the sound and stop splashing.
If the ceiling bulges, do not stand under it. Poke a small hole in the bulge with a screwdriver to release trapped water into your bucket.
Move Furniture and Protect Wet Belongings
Get furniture, rugs, and electronics out of the affected area. Water wicks into upholstery and wood fast, and wet belongings invite mold.
Snap photos of everything before you move it. That record matters later for your insurance claim.
Watch for Electrical and Ceiling-Collapse Hazards
Water and electricity do not mix. If water is near light fixtures, outlets, or a ceiling fan, shut off power to that room at the breaker.
Watch for these warning signs:
- Sagging or bulging ceiling
- Buzzing or crackling near outlets
- Standing water near wiring
If you see any of these, leave the room and call a professional. The Electrical Safety Foundation guidance on water and electricity is clear: never touch wet electrical fixtures.
Here are the first-day steps to take after a roof leak, in the order the article recommends them.
| Step | What to do | Watch for |
|---|---|---|
| 1 | Place a bucket or container under the drip | Line it with a towel to muffle sound |
| 2 | Poke a small hole in a bulging ceiling | Do not stand under the bulge |
| 3 | Move furniture, rugs, and electronics out | Snap photos before moving anything |
| 4 | Shut off power to the room at the breaker | Water near fixtures, outlets, or a ceiling fan |
| 5 | Leave the room and call a professional | Sagging ceiling, buzzing outlets, spreading cracks |
How to Stop a Roof Leak Temporarily Before Help Arrives
You can slow a roof leak before a pro arrives, but safety comes first. The goal is to reduce water entry, not fix the roof.
Trace the Leak Source From the Attic
The drip spot on your ceiling rarely sits right under the actual hole. Water runs along roof sheathing and joists before it drops. Head into the attic with a flashlight and look for:
- Water stains on rafters and sheathing
- Damp insulation
- Rusty roofing nails
Check the CDC guidance on home moisture and mold before you spend time in a damp attic. Wear a mask and gloves, and keep your footing on solid joists.
Safe Roof Access and Temporary Tarp Coverage
Climbing a wet roof is dangerous. If it is raining, windy, or dark, stay off the roof. Work from the attic instead.
When conditions are safe, follow these steps:
- Set your ladder on firm, level footing
- Keep three points of contact at all times
- Lay a tarp over the damaged area
- Overlap the edges and secure with boards, not nails
Never walk a wet roof alone. If the pitch is steep, call a pro. A fall is far worse than a wet ceiling.
Roof Leak Water Damage Cleanup and Drying Your Home
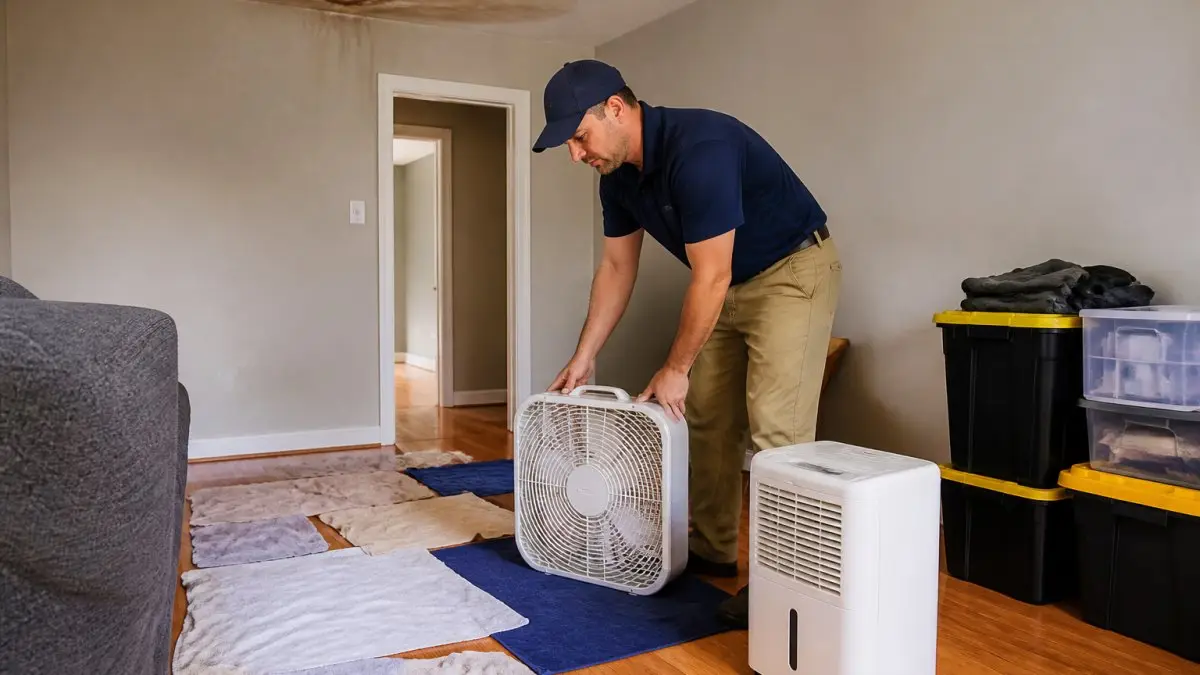
Drying is the step most homeowners rush, and it decides whether a leak becomes a mold problem.
Step 1: Stop the Water Source and Remove Standing Water
Before you dry anything, confirm the leak is contained. If water is still entering, drying equipment will fight a losing battle.
- Soak up standing water with towels, a wet/dry shop vacuum, or a mop
- Pull up wet carpet and padding, padding rarely dries fully and should be discarded
- Remove soaked drywall, ceiling tile, or insulation that has collapsed or is sagging
Step 2: Set Up Airflow and Dehumidification
Air movement alone moves moisture around; you need to remove it from the air. A common pattern is to pair fans with a dehumidifier in the closed affected room.
- Place box fans or air movers to blow across wet surfaces, not directly into wall cavities
- Run a dehumidifier sized for the room; empty the reservoir or route the drain continuously
- Close windows and doors to the affected room while the dehumidifier runs, open windows in humid weather can add moisture back
Step 3: Dry by Material Type
Different materials hold water differently, and treating them the same wastes time:
- Drywall and ceiling: If the paper facing is wet but the gypsum is firm, it may dry with airflow. If it is soft, crumbly, or stained, cut out and replace the affected section, trapped moisture behind paint feeds mold.
- Wood framing and sheathing: Dry slowly with airflow; rapid heat can cause warping and checking.
- Insulation: Fiberglass batts that are soaked lose effectiveness and should be replaced. Cellulose that is wet should be removed.
Step 4: Check for Hidden Moisture
Water travels. Check areas the drip did not obviously touch:
- Inside ceiling cavities and along joists above the stain
- Behind baseboards and inside wall cavities below the leak
- Attic insulation and roof sheathing
Use a moisture meter and look for discoloration, bubbling paint, or a musty odor. A musty smell after 48 hours signals moisture trapped somewhere you have not found.
Schedule An Appointment Today →
Step 5: Prevent Mold and Know When to Call a Pro
Mold prevention is mostly about speed and dryness. Keep the area ventilated, keep the dehumidifier running, and do not paint or seal over damp surfaces, that traps moisture and hides the problem.
Call a professional water remediation or mold remediation company when:
- The affected area is larger than roughly 10 square feet of porous material
- Water reached wall cavities, subflooring, or HVAC ducts
- A musty smell persists after 48-72 hours of drying
The EPA guidance on mold cleanup and moisture control and CDC guidance on home moisture and mold both stress that controlling moisture is the core of mold prevention, cleanup without fixing the moisture source will not last.
Do not run a standard household vacuum or a carpet cleaner over standing water unless it is rated for wet use. Water can reach the motor and create a shock hazard.
Step 6: Document Before You Discard
Before you throw away damaged drywall, insulation, carpet, or belongings, photograph each item in place with something for scale. Insurers and adjusters often want to see what was damaged before it was removed. Documenting these losses provides a clear baseline for the restoration process, which often requires fixing water damaged drywall to prevent long-term structural instability.
How to Document a Roof Leak Insurance Claim
Most homeowners policies cover sudden and accidental water damage from a roof leak, but the claim succeeds or fails on documentation. Your photos, receipts, and timeline become the evidence, so build the file the same day, before cleanup erases the proof.
What to Photograph and Record
Photograph wide, then close:
- The drip or water entry point, with a bucket or container in frame for context
- The ceiling stain, bubbling paint, or sagging drywall
- Wet insulation, joists, or sheathing in the attic
For each photo, note the date and time. A simple phone note or notebook works. Record:
- When you first noticed the leak
- When you called the insurer and who you spoke with
- Every repair or mitigation step and its cost
Keep Receipts and a Damage Inventory
Save every receipt for emergency supplies, tarps, buckets, fans, dehumidifier rental, towels, and temporary repair materials. Keep a written inventory of damaged items with approximate age, original cost if known, and replacement cost. Do not throw away damaged items until the adjuster has seen them or the insurer confirms in writing that you may discard them; if you must discard for safety or health reasons, photograph and document first.
Create a single folder, physical or digital, for the claim. Put photos, receipts, the damage inventory, and a dated log in it. When the adjuster asks for something, you can send it in one message instead of hunting through your phone.
Contact Your Insurer Early, But Mitigate First
You do not need to wait for the insurer’s approval to stop the damage. Most policies expect reasonable steps to prevent further damage, and coverage for emergency mitigation varies by policy. Call your insurer as soon as the immediate danger is controlled, report the claim, and ask:
- Whether emergency mitigation is covered and what documentation they need
- Whether they have a preferred contractor network or require multiple estimates
- What the deductible is and how it applies
The NAIC guide to homeowners insurance explains the claims process and your rights, and your state’s department of insurance can tell you what your policy must cover and how to file a complaint if a claim is mishandled.
Separate Emergency Mitigation From Permanent Repair
Insurers distinguish between stopping the damage and fixing the roof. Keep these separate in your records:
- Mitigation: tarping, water extraction, drying equipment, temporary patching, document these as emergency costs
- Permanent repair: shingle replacement, flashing repair, sheathing replacement, usually requires an adjuster inspection or approved estimate before work begins
Do not authorize permanent repairs before the adjuster has inspected the damage unless the insurer tells you to proceed.
Common Documentation Mistakes to Avoid
- Throwing away damaged materials before photographing them
- Relying on memory instead of a written timeline
- Failing to document the leak’s source, not just the interior stain
A licensed roofing contractor can help you present the damage clearly and avoid gaps in the claim file.
When a Temporary Fix Is Unsafe or Not Enough
Some leaks are beyond a bucket and a tarp. Call a professional right away if:
- The ceiling is sagging or cracked
- Water is near wiring or a breaker box
- The leak keeps spreading after your fix
A temporary patch can hide a bigger problem. If the damage points to a failing roof, it may be time to weigh repair against replacement. For current pricing on a roof repair, contact Covenant Roofing & Restoration for a quote, and our breakdown of signs you need roof replacement helps you judge whether the roof is due for a full swap.
Renter, Landlord, and Property-Manager Responsibilities
Who fixes the leak depends on who owns the building. Renters should report the leak to the landlord right away and document it in writing.
Property managers should act fast to protect the building and keep records for the owner. Tenants are usually responsible for their own belongings, so renters insurance matters.
Schedule a Professional Roof Inspection With Covenant Roofing & Restoration
A leak is a warning, not the whole story. The right fix starts with finding the real source. At Covenant Roofing & Restoration, we are a licensed Tennessee building contractor and GAF factory-certified company, and we help customers navigate insurance claims for roof damage. You can also review the signs of roof storm damage to spot trouble early.
Frequently Asked Questions
What should you do first after discovering a roof leak?
Move people and pets away from the dripping area, then place a bucket or container under the leak to catch water. Move furniture and wet belongings out of the way, and check for electrical hazards near the ceiling. If water is near outlets, lights, or a sagging ceiling, cut power to that area and call a professional. Document the damage with photos before you start cleanup so your roof leak insurance claim has a clear record.
Is a roof leak covered by insurance?
Many homeowners policies cover sudden damage from storms, wind, or hail that causes a roof leak, but exclusions vary and can apply to neglected maintenance or an aging roof. Save receipts, photos, and a written timeline, and report the roof leak insurance claim promptly. A licensed contractor can inspect the roof and document the cause, which supports your claim. Coverage and deductibles vary by policy, so confirm the details with your insurer.
How do you protect your belongings after a roof leak?
Move furniture, electronics, and rugs away from the dripping water right away. Place plastic sheeting over items you cannot move, and lift wet belongings off the floor so they can dry. Use towels or a wet/dry vacuum for standing water, then run fans and a dehumidifier in a well-ventilated area. Quick roof leak water damage cleanup in the first 24 hours limits staining, warping, and mold growth.
When should you call a roofing contractor after a leak?
Call a roofing professional as soon as you have contained the water and documented the damage, especially if the leak is active during rain, the ceiling is sagging, or you cannot safely reach the roof. A contractor can trace the leak source, make a safe temporary repair, and assess damaged shingles or roof sheathing. For emergency storm damage in the Greeneville area, schedule an inspection early so repairs and any insurance claim move forward without delay.
A small leak today can turn into a big repair tomorrow. Do not wait for the next storm to make it worse. Get started with Covenant Roofing & Restoration and protect your home with quality craftsmanship, clear communication, and help navigating your insurance claim. Schedule an appointment today.