Last Updated: October 25, 2026
Quick Summary
The signs of roof storm damage include missing, cracked, curled, or lifted shingles, granule loss with exposed shingle surfaces, water leaks and ceiling stains, attic moisture, and damaged flashing around chimneys, vents, and roof edges. Check these after any significant wind, hail, or heavy rain event, because the earlier you spot a problem, the cheaper it is to fix.
- Inspect from the ground with binoculars and check downspout outlets for granule piles, shingle pieces, and nail pops.
- Hail damage is often a bruise, not a puncture, so it is best confirmed by a professional slope walk.
- Storm damage is sudden and clustered, while normal aging builds gradually and evenly across the roof.
- Photograph everything with wide shots and close-ups, keep damaged materials, and write down the storm date.
- Call a professional if you see missing shingles, an active leak, or suspected hail you cannot see from the ground.
Table of Contents
- Why Storm Damage Often Goes Unnoticed Until It’s Costly
- 7 Common Signs of Roof Storm Damage to Check First
- How to Inspect a Roof After a Storm Without Climbing On It
- Hail Damage to Roof Signs: What Hail Leaves Behind
- Storm Damage vs. Normal Aging: How to Tell the Difference
- Your Roof Storm Damage Checklist for Gutters, Metal Roofing, and Debris
- How to Document Roof Damage for Insurance Before You File a Claim
- Schedule a Professional Roof Inspection Before the Next Rain
- Frequently Asked Questions
Why Storm Damage Often Goes Unnoticed Until It’s Costly
Most roof storm damage hides in plain sight.
By the time water shows up inside, the roof has usually been failing for weeks: wind lifts shingles, hail cracks the mat, and water finds the gap.
At Covenant Roofing & Restoration, we see this constantly across Greene County: homeowners call after a leak appears, not after the storm.
This guide covers the seven signs worth checking first, plus how to inspect safely from the ground, how to tell storm damage from normal aging, and how to document everything before you file a claim. The National Weather Service storm safety guidance is a good reminder that the safest inspection starts with both feet on the ground.
7 Common Signs of Roof Storm Damage to Check First
Roof storm damage usually shows up in seven predictable places. Check each one after any significant wind, hail, or heavy rain event. The earlier you spot a problem, the cheaper it is to fix.
Missing, Cracked, Curled, or Lifted Shingles
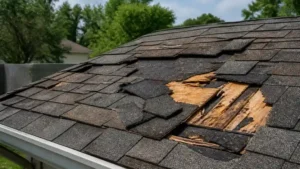
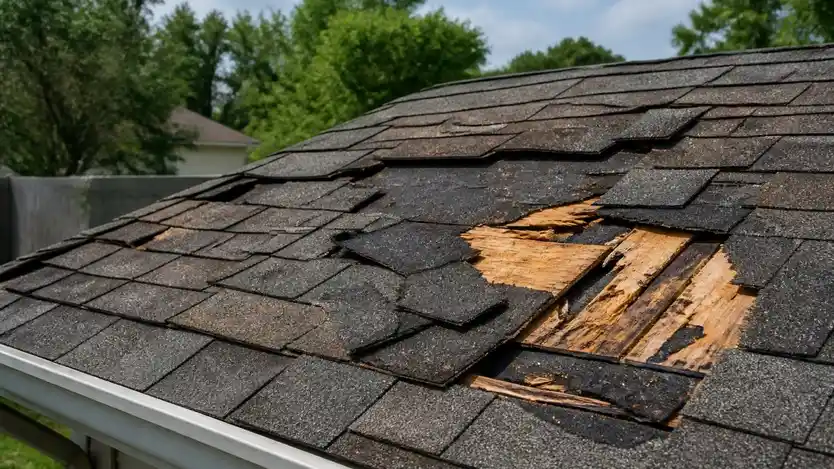
Shingles are your roof’s first line of defense. After a storm, look for missing shingles leaving bare deck patches, cracked shingles with visible splits, curled shingles whose edges lift and roll, and lifted shingles that no longer seal flat. Wind is the usual cause: gusts pry up a shingle edge, and once one lifts, its neighbors are next.
Granule Loss and Exposed Shingle Surfaces
Shingle granules protect the asphalt underneath from sun and rain. After hail or high wind, they wash into gutters and pile up at downspout outlets. Dark, smooth patches mean the granules are gone and the exposed surface will break down fast, heavy piles at your downspouts after one storm mean real loss up top.
Water Leaks, Ceiling Stains, and Attic Moisture
Water is patient: it travels along rafters and shows up far from the breach. Watch for brown or yellow ceiling stains and wall stains, water leaks during or after rain, attic moisture, damp insulation or a musty smell, and water pooling on the attic floor. Any of these point to moisture intrusion that started at the roof, and attic moisture that never dries can lead to mold and structural damage.
Damaged Flashing Around Chimneys, Vents, and Roof Edges
Flashing is the metal that seals joints where the roof meets chimneys, vents, skylights, and roof edges. Storms bend and loosen it: loose flashing or chimney flashing pulled from the masonry lets water straight into the structure, and vent flashing takes a beating from wind too. Check these closely, leaks here are easy to miss until they cause real harm.
How to Inspect a Roof After a Storm Without Climbing On It
You do not need to get on the roof to spot most storm damage, in fact, you shouldn’t. Wet shingles are slick, and a fall is far worse than a leak. The safest inspection is a structured ground-level walk that records what you can see, followed by a professional slope walk when the evidence warrants it.
The Safety-First Inspection Sequence
Run this sequence in order after any significant wind, hail, or heavy rain event; each step informs the next.
- Wait for the storm to pass and the roof to dry. Wet shingles and metal are slick, and standing water hides damage.
- Walk the perimeter with binoculars. Scan each slope for missing shingles, lifted edges, dark patches, and debris. Note which side shows the most damage, storm damage is often directional.
- Check the ground at downspout outlets. Granule piles, shingle pieces, and nail pops are direct evidence of loss up top. Photograph them before you clean up.
- Inspect gutters and downspouts from a ladder only if you are comfortable and it is stable. Look for dents, sagging, separated sections, and granule buildup. If ladder work is not safe, skip it and note it for the professional.
- Inspect the attic with a flashlight. Look for ceiling stains, damp insulation, water trails on rafters, and daylight through the roof deck.
- Photograph everything. Take wide shots showing the roof in context and close-ups of the specific damage, with a date stamp if possible.
- Write down the storm date and what you observed. A simple written record is valuable for insurance and for the professional who inspects the roof.
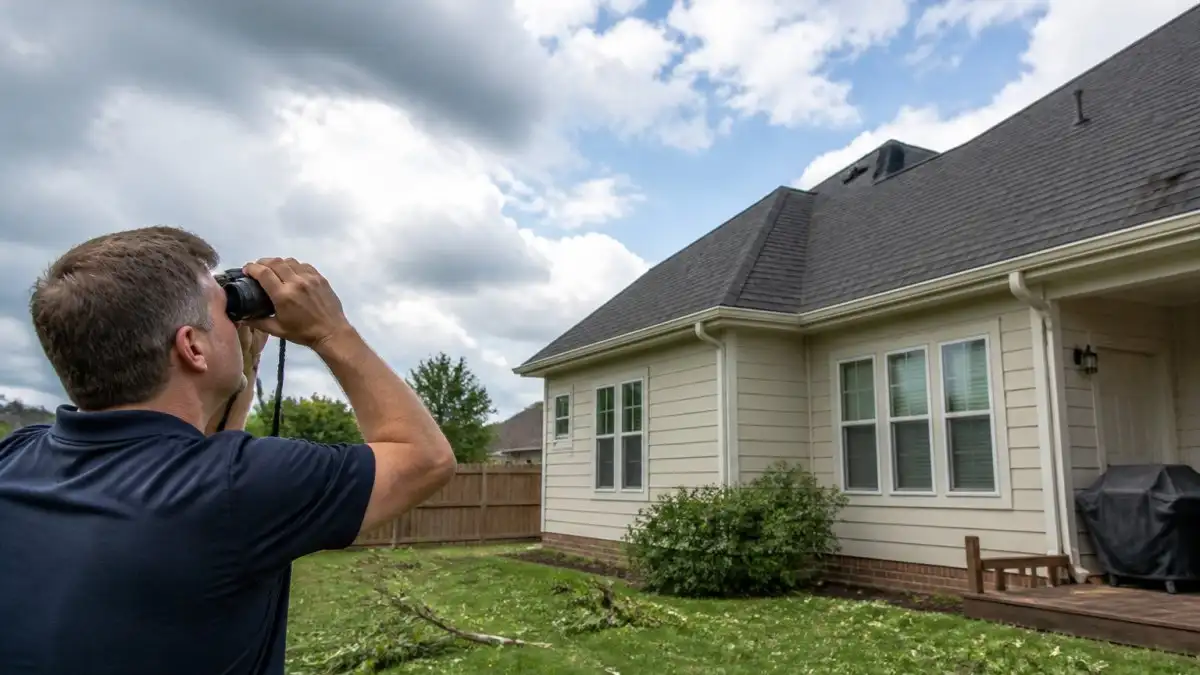
What You Can and Cannot See from the Ground
A ground-level inspection catches missing shingles, lifted edges, large granule loss, gutter damage, and debris. It is poor at catching hail bruises, cracked mats, flashing separation, and small punctures, those require a slope walk and close-up inspection. Knowing that limit tells you when to call a professional.
When to Leave the Inspection to a Professional
Call a professional inspector if any of the following are true:
- You see missing, lifted, or cracked shingles from the ground.
- There is an active leak, ceiling stain, or attic moisture.
- Hail is suspected and you cannot see the impact points.
A professional inspection is not just about climbing the roof. It produces a written record with photographs and measurements that supports an insurance claim and gives you a clear repair scope, often the difference between a smooth claim and a disputed one.
Storm-Specific Observation Points
Different storms leave different clues, so look for the pattern that matches the event:
- After hail: random dark spots, granule piles at downspouts, and dents on gutters, vents, and metal roofing.
- After straight-line winds: lifted or missing shingles on one slope, creased tabs, and debris impact marks.
- After heavy rain: ceiling stains, attic moisture, and water trails, which point to a breach that may not be visible from the ground.
If you want a pro to handle the climbing and the paperwork, a professional inspection can explain what it involves and how to book one.
Hail Damage to Roof Signs: What Hail Leaves Behind
Hail damage to roof signs are subtle and easy to miss from the ground. Unlike wind, which tears and lifts, hail bruises. The impact knocks granules loose and fractures the asphalt mat below, and the surface often looks like a small dark spot rather than a hole. That is why hail damage is frequently missed on a driveway glance and only discovered when an adjuster or roofer walks the slope.
What Hail Actually Does to a Shingle
An asphalt shingle is a layered system: a fiberglass mat core, asphalt coating, and a granule surface. Hail impact does three things in sequence:
- Granule displacement, the impact knocks granules free, exposing the asphalt below.
- Mat fracture, the fiberglass mat cracks at the point of impact, creating a weak spot water can exploit.
- Bruising, the asphalt coating is compressed and softened, which feels like a dimple underfoot and breaks down faster in sunlight.
A hail hit that looks minor on day one can become a leak after a season of freeze-thaw cycles, the damage is progressive, not immediate.
Schedule An Appointment Today →
Hail Damage Clues by Roof Component
Hail does not hit every surface the same way, so check each component separately:
- Shingles: dark spots, soft dimples, cracked mats radiating from an impact point, and fresh granule loss in a random pattern.
- Metal roofing: dents, dimples, and fractured paint or coating at the impact point, often easier to see at a low sun angle.
- Gutters and downspouts: dents on the top edge and face of the gutter, and granule piles at downspout outlets.
Hail Size and Damage Potential
Hail damage potential rises with stone size, but wind speed and roof age matter just as much. A common rule of thumb: hail under about one inch rarely causes functional damage to newer shingles, while larger, denser stones increase the likelihood of mat fracture; older, brittle shingles can be damaged by smaller stones.
Do not assume a roof is undamaged because you cannot see holes. Hail damage is often a bruise, not a puncture, and is best confirmed by a professional inspection with a slope walk and close-up of impact points.
How Hail Damage Differs from Wind and Debris Damage
Hail leaves random, clustered impact marks with no directional pattern. Wind damage tends to be directional, lifted edges, missing shingles on the windward slope, creased tabs. Debris damage is punctate and localized, often with visible punctures or gouges from limbs. A mix of random dimples and directional lifting may mean more than one damage mechanism from the same storm.
When Hail Damage Is Urgent
Most hail damage is not an emergency, but a few conditions move it up the priority list:
- Active leak or ceiling stain after the hail event, treat as urgent and limit interior water damage immediately.
- Fractured mat with exposed fiberglass, schedule an inspection promptly, because the weak point will worsen with weather.
- Dented or separated flashing, water can enter at the joint, so have it checked before the next heavy rain.
If you are unsure which category your roof falls into, a professional inspection is the fastest way to separate a scheduled repair from an urgent one.
Storm Damage vs. Normal Aging: How to Tell the Difference
Telling storm damage from normal aging comes down to pattern and timing: storm damage is sudden and clustered, normal wear gradual and even.
| Clue | Storm Damage | Normal Aging |
|---|---|---|
| Timing | Appears after one event | Builds over years |
| Pattern | Random, clustered hits | Even wear across roof |
| Shingles | Cracked, lifted, missing | Curled, brittle, thinning |
| Granules | Sudden heavy loss | Slow, steady loss |
| Metal parts | Fresh dents | Rust and dulling |
This distinction matters for insurance: a claim for damage that predates the storm is likely to be denied. If you are unsure whether your roof needs repair or replacement, a guide can walk through the decision.
Your Roof Storm Damage Checklist for Gutters, Metal Roofing, and Debris
A roof storm damage checklist keeps you from missing the less obvious problems. Run through it after every major storm.
- Gutters: check for dented gutters, sagging, or sections pulled loose
- Downspouts: confirm they are attached and draining away from the house
- Metal roofing: look for dents, lifted panels, and loose fasteners
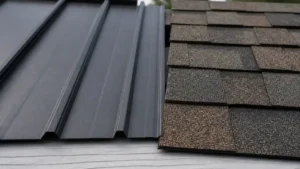
Tree debris left sitting on a roof traps moisture and speeds up rot. If you are weighing material durability after a hit, a comparison of metal roof vs shingle durability breaks down how each holds up.
How to Document Roof Damage for Insurance Before You File a Claim
Documenting roof damage for insurance starts before you call anyone. Good records make the difference between a smooth claim and a fight. Follow this order:
- Photograph everything with wide shots and close-ups, and include a date stamp.
- Keep damaged materials in a safe spot until the adjuster sees them.
- Write down the storm date and what you observed.
- Save receipts for any temporary repairs.
- Get a professional assessment to back up your claim.
Clear photographs and a written record are what adjusters need. If your first claim was denied, a proper inspection and a complete file often change the outcome. Our team specializes in insurance claim navigation and can help you build that file.
Schedule a Professional Roof Inspection Before the Next Rain
The window between a storm and the next rain is short. Every day you wait, water intrusion gets deeper and structural damage gets more expensive.
Covenant Roofing & Restoration is a licensed Tennessee building contractor and GAF factory-certified company. We handle shingle and metal roofing systems and navigate insurance claims so you are not left fighting the adjuster alone.
Before you commit, understand pricing: contact us for a clear starting point so there are no surprises. Our Greeneville TN roof replacement cost guide offers local context for your decision. You can also review our roof repair pricing guide to see typical costs.
Frequently Asked Questions
Does homeowners insurance cover roof storm damage?
Most standard homeowners policies cover sudden storm damage from wind, hail, or fallen branches. Normal wear and aging is typically excluded. The key is timing: file promptly after the storm, photograph everything before repairs, and keep receipts for any temporary mitigation. A licensed contractor can help you document the damage in a way that supports the claim, especially if your first claim was denied.
Can roof storm damage be hidden from the ground?
Yes. Many of the most serious signs of roof storm damage, such as cracked shingles, loose flashing, or soft decking, are not visible from the ground. Ground-level inspection catches obvious problems like missing shingles and dented gutters, but a professional roof assessment is the only reliable way to confirm what is happening on the surface and underneath.
What should I check on my roof after a storm?
Start with a ground-level walkaround: look for missing or lifted shingles, granules in gutters and downspouts, dented metal, and tree debris. Inside, check ceilings and attic walls for water stains or moisture. Then use the roof storm damage checklist in this guide to record what you find with photos and dates before calling a roofing professional for a full inspection.
How do I document roof damage for insurance?
Photograph every affected area from multiple angles, including wide shots that show location and close-ups that show detail. Note the date, time, and weather event. Keep damaged shingle pieces and receipts for temporary repairs. Do not throw anything away until the adjuster has seen it. A contractor experienced with insurance claims can review your documentation and help you present a complete, accurate claim.
Storm damage rarely waits, and neither should you. Get a straight answer on your roof before the next rain. Get started with Covenant Roofing & Restoration and schedule an appointment today for a thorough inspection, honest communication, and a plan that protects your home.